Tuesday, July 23, 2013

Gluten Free Breakfast: Oatmeal with Almond Milk


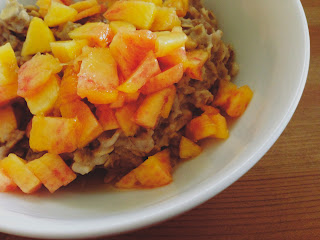
If you cook your oatmeal this way, you will never go back to cooking it any other way.  I guarantee  it.  My aunt created this recipe and showed me how to make it.  I have been eating it with fresh peaches since they are in season, but in the winter, thinly sliced pears added to it are delicious.

To make it you need the following ingredients:

1/2 Cup Old Fashioned Oats
3/4 - 1 Cup Sweetened Vanilla Almond Milk
Cinnamon
Fresh Fruit

Topping options:
Drizzle of Maple Syrup 
Spoonful of plain Greek yogurt

Put the oats in a pot and add the almond milk. Turn the stove on to medium high heat.  Add a sprinkle of cinnamon and stir.  Keep an eye on the oats - you might need to add a little more almond milk.  Cook the oats to your favorite consistency.  I like them a little crunchy.  If you would like to cook the fruit a little, you can add it to the oats while they are cooking.  If you prefer to add the fruit to the oats once they are in the bowl, go ahead!  Top with maple syrup or a spoonful of yogurt (or both!). 

Gluten Free PSA:

Oats are tricky, because they are often contaminated, which is why you should always buy certified GF oats if you are allergic to gluten.  This article explains more: Gluten Contamination of Commercial Oat Products in the United States


Saturday, July 20, 2013

Product Review: Schär Gluten-Free Baguettes

I recently co-chaperoned an exchange to France and was surrounded by baguettes.  I sat across the aisle on a train from a man who devoured an entire one over the course of our journey.  I think sometimes it would be easier to be gluten free if you had never eaten bread before.  That way, you didn't know the joy of biting into a baguette that is crispy on the outside and chewy on the inside.  It is hard to replicate that consistency in a gluten free baguette.

However, Schär has created a product that is an excellent gluten free version of a French staple.  You bake their baguettes in the oven for 5 minutes on 400 degrees.  The texture is similar to a regular baguette, and they even pass GFF's hubby's discerning opinion of gluten free products.

If you are having a gluten free guest to lunch this summer, I recommend making a tomato, basil, and mozzarella salad (with olive oil, garlic, balsamic vinegar, and red onions if you like them) and serving it with a Schär baguette.  Everyone (even the gluten eaters) will love it!


Wednesday, July 17, 2013

Gluten Free Dessert: Marble Loaf Cake

Remember me?  I have never been a good journal writer or diary keeper, so I guess it isn't a surprise that I am not the greatest blogger.  It has been a year since my last post!  A friend asked me for a recipe on Facebook, so I decided that it was a good reason to try to start blogging again.  We shall see if it sticks!

My mom used to make this cake when I was little.  The recipe is adapted from an older edition of the Betty Crocker red binder cookbook.  I have a newer version of it, and the recipes are not the same, nor are the names of the recipes as good.  Happy baking!


Loaf O' Gold (See? Such a fantastic name for a cake!)

2 cups all-purpose flour (or 2 cups gluten free flour mix like Cup 4 Cup)
1 cup sugar
3 teaspoons baking powder
1 teaspoon salt (omit if using salted butter)
3/4 cup milk
1/2 cup butter, softened
1 egg + 1 egg white
1 teaspoon vanilla

Heat oven to 350 degrees.  Grease and flour loaf pan.  Measure all ingredients into large mixer bowl.  Blend 1/2 minute on low speed, scraping bowl constantly.  Beat 3 minutes high speed, scraping bowl occasionally.  Pour into pan.

Bake 65 Minutes*

Marble Variation

Pour 1/2 of the batter into a small bowl; stir in 1 ounce melted unsweetened chocolate (cool).  Pour remaining batter into pan; spoon batter over top and swirl.

*if you are using a gluten free flour blend, start checking it at 45 minutes.  Mine was finished around 53 minutes - gluten free flour blends can be tricky and cakes can easily turn into sandcastle texture.)


Saturday, July 28, 2012

Gluten Free Birthdays - Chicken Adobo and Peach Pie

It is amazing how many gluten-filled food traditions are tied to birthdays.  I have found that it helps to think outside of the birthday-cake-box and come up with new desserts to help celebrate.

GFF's Ma turned 58 this week and we had her over to the little twin house for dinner. Dinner was Chicken Adobo, a delicious new recipe from my mother-in-law.  The original recipe calls for bone-in chicken thighs, but I followed her advice and used boneless, skinless chicken thighs, which I find much easier to work with on the stove-top.

Gluten Free Chicken Adobo 

Gluten Free Chicken Adobo - adapted from Cook's Illustrated

1 package boneless, skinless chicken thighs
1/3 cup gluten free soy sauce
1 (13.5 oz.) can coconut milk
3/4 cup cider vinegar
8 garlic cloves peeled
4 bay leaves
2 teaspoons black pepper
Thinly sliced scallions

1.  Toss chicken with soy sauce in large bowl.  Refrigerate for at least 30 minutes and up to 1 hour.

2.  Remove chicken from soy sauce, allowing excess to drip back into bowl.  Transfer chicken to 12-inch nonstick skillet, set aside soy sauce.

3.  Place skillet over medium-high heat and brown thighs.  While chicken is browning, whisk coconut milk, vinegar, garlic, bay leaves, and pepper into soy sauce.

4.  Transfer chicken to plate and discard fat in skillet.  Return chicken to skillet, add coconut milk mixture, and bring to boil.  Reduce heat to medium-low and simmer uncovered for approximately 10 minutes (depending on the thickness of your chicken thighs).  Flip chicken and continue to cook for about 10 more minutes (again, this timing is approximate, depending on the thickness of the thighs.) Transfer chicken to platter and tent loosely with aluminum foil.

5.  Remove bay leaves and skim any fat off surface of sauce.  Return skillet to medium-high heat and cook until sauce is thickened, 5 to 7 minutes.  Pour sauce over chicken, sprinkle with scallions, and serve with short grain brown rice.

~

It is hard to describe just how delicious this dish is, especially when you follow it with a yummy peach pie, made with local peaches from the Lancaster County Farmer's Market in Wayne.  Making gluten free pie gets easier every time.  Unlike normal pie crust, I have found that gluten free pie dough is much easier to work with if you only refrigerate it for 20 minutes, because it rolls out a lot better.  You also have to work quickly when you flip it into the pie dish or it will fall apart on you really fast!  I also think it is better to make a smaller pie (or a few smaller pies) instead of a big pie, because you have more control over the crust.  Be prepared to patch your dough and refer to it as "rustic" as much as you can.  That makes the rough appearance look intentional!

Gluten Free Birthday Peach Pie 


Gluten Free Pie Crust

6 Tbsp. Butter
6 Tbsp. Vegetable Shortening
1/2 cup cold water

1.  Place all the ingredients except the water in food processor and blend until fine crumbs are formed.
2.  Add the water a little at a time until the dough is sufficiently moist to form into a ball.
3.  Cut the dough in half, wrap in wax paper, and refrigerate for 20 minutes. 
4.  Roll the top and bottom crusts separately


Gluten Free Peach Pie Filling

5-6 peeled and sliced peaches
2/3 cups sugar
1 tsp. cornstarch
1 tsp. lemon juice
1/2 tsp. cinnamon

1.  Heat oven to 425 degrees.
2.  Mix sugar, flour, cornstarch and cinnamon in a large bowl.  
3.  Stir in peaches and lemon juice. 
4. Turn into pastry-lined pie plate.
5.  Cover with top pastry and patch any cracks in the dough.  Smile - you love baking gluten free pie, no matter how difficult the dough is!
6.  Seal the edges with a fork.
7.  Poke holes in the top to let steam out
8.   Cover edge with 2 - 3 inch strip of aluminum foil.  Remove foil during last 15 minutes of baking.
9.  Bake about 45 minutes or until crust is golden-brown and juice begins to bubble through slits in the crust.  Cool on a wire rack.


Happy Birthday, Ma!


Saturday, June 2, 2012

Sesame Chicken

At first glance, most Asian cuisine seems very gluten free friendly.  Rice, meat, fish, and veggies are great!  However, lurking in a lot of Asian cuisine is a GF person's enemy:  soy sauce.  Traditional soy sauce is a mix of fermented boiled soybeans and roasted wheat or barley - both of which contain gluten.  This makes it quite difficult to eat in Asian restaurants.  There are some that offer gluten free options, but I must say that I am not certain if they realize that soy sauce contains gluten, because I have gotten quite sick from eating supposedly gluten free Asian cuisine.


Luckily, San-J makes a gluten free soy sauce that is delicious.  I really enjoy eating Asian dishes, so I have started making them at home, where I know everything is definitely gluten free.


One of our favorites is a Sesame Chicken Recipe by Ellie Krieger that I saw in the January 2012 issue of Better Homes and Gardens, which I have adapted slightly.  The recipe below reflects my changes.  


Sesame Chicken with Broccoli
tablespoons reduced-sodium gluten free soy sauce
2 teaspoons toasted sesame oil
5 teaspoons honey
1 1/4 pounds skinless boneless organic chicken breasts, cut into 1-inch pieces
2 tablespoons extra light tasting olive oil
2 green onions, white parts thinly sliced and green tops reserved
3 cloves garlic, minced
1 1/2 cups low-sodium chicken broth
4 teaspoons cornstarch
1 tablespoon rice vinegar
1 teaspoon chili paste (Huey Fong Sambal Oelek Chili Paste is gluten free)
2 small heads broccoli, cut in florets, steamed until crisp-tender, 4 to 5 minutes
3 tablespoons toasted sesame seeds
Short grain brown rice for serving


1. In a medium bowl whisk together 3 tbsp. of the gluten free soy sauce, 1 tsp. sesame oil, and 2 tsp. honey. Add cut-up chicken, toss to coat, then marinate for 20 minutes. Remove chicken from marinade with a slotted spoon. Discard the marinade.

2. In a large nonstick skillet or wok heat 2 tsp. of olive oil over medium-high heat. Cook half the chicken at a time for 6 minutes until browned and cooked through, turning once or twice. Transfer to a large serving plate. Heat 2 tsp. olive oil to cook remaining chicken. Transfer to serving plate.

3. In the same skillet heat the remaining 2 tsp. olive oil oil over medium-high heat. Add the white parts of onions and garlic. Cook and stir for 1 to 2 minutes until fragrant. 

4. For sesame sauce, in a small bowl whisk together broth, remaining soy sauce, remaining honey, the cornstarch, vinegar, and chili paste until cornstarch and honey are incorporated. Add sauce to skillet. Cook and stir for 2 to 3 minutes until thickened and darkened in color. Stir in remaining 1 tsp. sesame oil.

To serve, pour sauce over chicken. Surround chicken with steamed broccoli. Sprinkle with sesame seeds and green onion tops. Serve with brown rice, if desired.

Sunday, May 27, 2012

Grilled-Fish Tacos

A typical Philadelphia summer has slowly rolled in - hazy, hot, and humid.  In an effort to keep the house cool, we have been grilling a lot.

These Grilled-Fish Tacos with Roasted-Chile-and-Avocado Salsa were absolutely delicious.  The GFF's hubby is the griller in the little twin house, so we worked together on these.  We followed the recipe (although we did leave out the cilantro - you know how I feel about cilantro) and topped them with this Grilled Corn Salad (sans cilantro and mint).  GFFH grilled the corn tortillas for a few minutes before we ate, which made the tortillas a lot easier to handle - corn tortillas can be quite brittle and hard to work with when they are soft.

Roasted-Chile-and-Avocado Salsa
Grilled Corn Salad
Grilled-Fish Tacos
I also saved a little piece of halibut for the neighborhood cat, Kitty.  Since she licked the plate clean, I am pretty sure she approved of our dinner choice.


Sunday, May 20, 2012

Southwestern Stuffed Peppers

I love clipping recipes out of magazines and then putting my own spin on them.  Southwestern Stuffed Peppers from Real Simple sounded like they would be a hit in the little twin house and turned out to be a great weeknight meal. 

I made these with ground chicken because I do not eat beef.  When I was little, I always felt sick after eating red meat, so I stopped eating it.  Now that I have been diagnosed with Celiac disease, we have realized that I probably felt sick when I was little due to whatever wheat product was served with the red meat!  So, although I could eat red meat again, I just do not care for the taste of it anymore because I associate it with a stomachache. 

The original recipe calls for 4 bell peppers, but Wegmans had a great deal on a 3 pack, so I just made 6 halves that were generously filled.  Here is my adaptation of this great recipe!


Southwestern Stuffed Peppers

1 cup short grain brown rice
1 tablespoon olive oil
6 scallions, thinly sliced, white and green parts separated
1/2 pound ground chicken
1 cup frozen corn
 4.5 ounce can chopped green chiles
1/2 teaspoon ground cumin
4 oz. grated Pepper Jack cheese
salt & pepper
3 large bell peppers, halved lengthwise, ribs and seeds removed
hot sauce, for serving (optional)

  1. Heat oven to 375° F. Cook the rice according to the package directions.
  2. Heat the oil in a large skillet over medium-high heat. Add the scallion whites and chicken and cook, breaking the chicken up with a spoon, until no longer pink, 3 to 5 minutes. Stir in the corn, chilies, cumin, cooked rice, ½ cup of the Pepper Jack, ½ teaspoon salt, and ¼ teaspoon black pepper.
  3. Arrange the bell peppers, cut-side up, in a 9-by-13-inch baking dish or pan. Divide the chicken mixture among the bell peppers, add ½ cup water to the dish, tightly cover the dish with foil, and bake until the bell peppers are soft, 30 to 40 minutes. Uncover, sprinkle with the remaining ½ cup of Pepper Jack, and bake until browned, 5 to 7 minutes more.
  4. Top with the hot sauce (if you are like GFF's hubby) and scallion greens.